Creating an OpenFlow Playground with OVS:
A Homemade Mininet Alternative
# Brief introduction
# System requirements
# Creating a topology in OVS-Mesh Script Generator
# A quick topology check using ONOS
# Host configuration
# Cleaning up the mess
# About OVS-Mesh Script Generator
Brief introduction
A few years ago (and for reasons which I no longer remember), one of my colleagues got very frustrated with Mininet and approached me for help. As a workaround for the issue, I presented her with a simple Bash script which required manual editing each time a topology change was needed. Eventually, this solution evolved into a web UI script generator, which is now publicly available in our demo section.

System requirements
The instructions presented in this blog post have been tested on both Ubuntu 16.04 and 18.04. They should, however, work the same on any reasonably old member or derivative of the Debian/Ubuntu family. If you have intentions of following through this post, we highly recommend that you do so in some isolated environment (a sandbox VM or some old PC) where the risk of losing your data or something else going wrong is minimal. Having Docker installed is not strictly necessary but could be of help if you don't already have a spare OpenFlow controller for this kind of testing.
As a first step on this journey, we need to install Open vSwitch:
# apt-get update
# apt-get -y install openvswitch-vswitch
Note: Unlike $, the # prompt marks the commands for which you need to acquire root privilegies. You can also prefix these commands with the sudo command (if available on your system) to run them.
Once installed, you can check the Open vSwitch version as follows:
$ ovs-vswitchd --version
ovs-vswitchd (Open vSwitch) 2.9.2
The latest compatibilty matrix for OVS and OpenFlow versions can be found here. At the time of testing and updating this post for Ubuntu 18.04, the table looked liked this:
| Open vSwitch | OF1.0 | OF1.1 | OF1.2 | OF1.3 | OF1.4 | OF1.5 |
|---|---|---|---|---|---|---|
| 1.9 and earlier | yes | — | — | — | — | — |
| 1.10, 1.11 | yes | — | (*) | (*) | — | — |
| 2.0, 2.1 | yes | (*) | (*) | (*) | — | — |
| 2.2 | yes | (*) | (*) | (*) | (%) | (*) |
| 2.3, 2.4 | yes | yes | yes | yes | (*) | (*) |
| 2.5, 2.6, 2.7 | yes | yes | yes | yes | (*) | (*) |
| 2.8, 2.9, 2.10, 2.11 | yes | yes | yes | yes | yes | (*) |
| 2.12 | yes | yes | yes | yes | yes | yes |
(*) Supported, with one or more missing features.
(%) Experimental, unsafe implementation.
If you're not happy with the version of OVS or OpenFlow that comes with the default packaging for your operating system, there is somewhat adventurous option to build OVS directly from the source code (check here for detailed instructions on how to proceed with this).
Creating a topology in OVS-Mesh Script Generator
The next step is to create a data-plane topology you would like to present to your OpenFlow controller. This is where OVS-Mesh Script Generator comes into play:
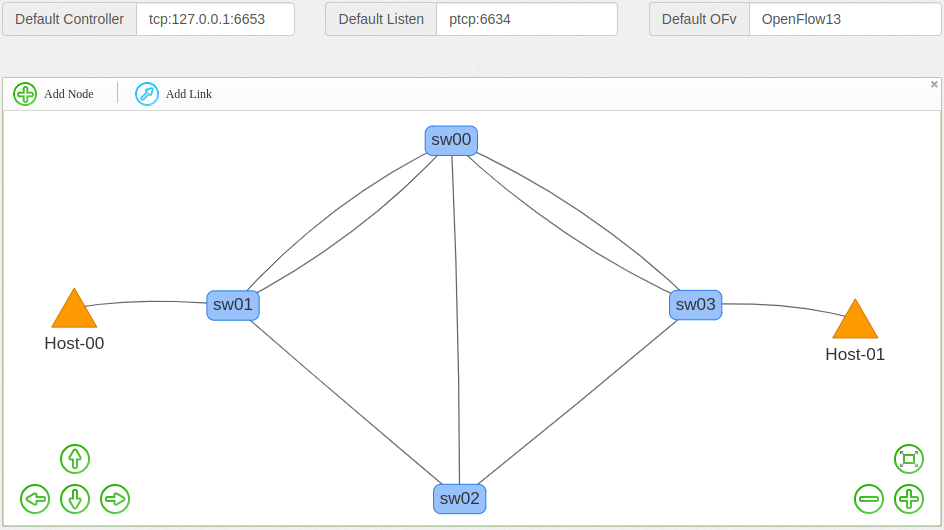
Note: The OVS-Mesh Script Generator will not display properly in older or outdated browsers.
Each switch should be configured with the Controller, Listen and OpenFlow version values as described in the man 8 ovs-vsctl. The values can be specified for each switch individually (while adding them to the graph for the first time or by editing them afterwards). When adding a switch for the first time, the defaults from the top of the page will be offered as shown on the screenshot below:
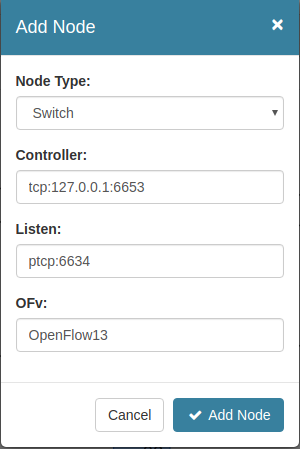
Note: Changing the defaults at the top of the page will also affect the switches holding the old values.
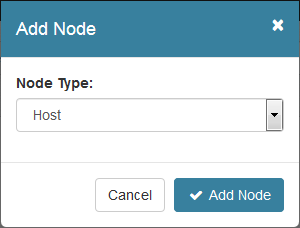
The other type of node that can be added to the graph is a host. Hosts do not have any configurable parameters and are a described in a separate section.
As a result of the changes you make on the graph, the Bash script shown in the frame below will also change. This script is what you will run on your system in order to create a desired OpenFlow playground:
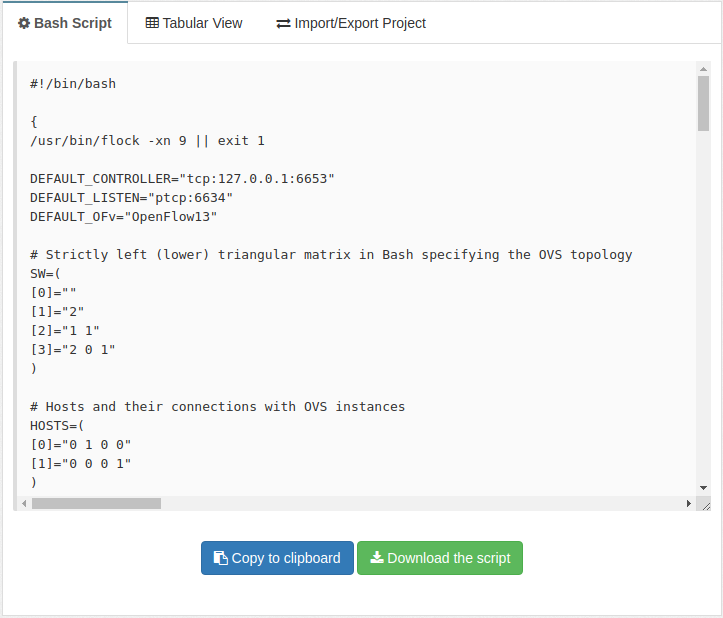
Once you are done with setting your topology and parameters, you can copy-paste the data-plane script to your favorite editor (vim, nano, joe, ...) and save it under the name such as /root/ovs-mesh.sh (you will need root privilegies for this particular path). After that, you can add the execute permissions to the owner of this file:
# chmod u+x /root/ovs-mesh.sh
In order for your OVS playground to survive accross reboots, add the following line in to your /etc/rc.local (just above the exit 0 command):
/root/ovs-mesh.sh > /root/ovs-mesh.log 2>&1 &
You can use the same command to run the script directly from the shell:
# /root/ovs-mesh.sh > /root/ovs-mesh.log 2>&1 &Note: Running scripts as root should always raise some security concerns. It's probably a good idea to examine the content of the script before executing it. Or even better, run it in a sandbox environment in which it cannot do much harm.
Note: Don't forget to update your PATH environment variable if running a manually built version of OVS.
If everything went as expected, the content of the /root/ovs-mesh.log should look something like this:
# cat /root/ ovs-mesh.log
(Re-)creating OVS instances...
1cdf7502-baf7-4319-b223-2c395bbfb311
23968dd7-b1de-4bab-8e79-1810cbf25c8a
a728ff56-39cc-431f-b0ba-74acf9487105
873b32b8-8d5f-439e-9744-091012599d72
2b564d5b-760c-444d-a31c-6151cfff0469
13f43368-eb3b-48ff-8108-c3add38fd528
ec388a37-02b3-4fcd-9dfb-8e1b4aeca2a6
51878ad1-1684-43d5-b61b-82cddd5ce2cd
5c1ede3b-8443-4f1e-a8e4-a9afa7d13f1f
afad859b-2549-4454-ab05-78928148d9b6
The list of OVS instances is: sw00 sw01 sw02 sw03 sw04

Instantiating virtual crossover cables...

Connecting OVS instances to each other...

Creating hosts...

Creating and connecting virtual patch cables...

Press Ctrl-C to exit...
A quick topology check using ONOS
If you don't have a spare OpenFlow controller for testing and you are not sure where to start, we can recommend ONOS (Open Network Operating System) as it is free and relatively easy to set up option.
Note: You can skip this section if you already have an OpenFlow controller suitable for this kind of testing.
Detailed instructions on how to manually install and run ONOS can be found on its official Wiki page. However, for the purposes of this blog post, Docker deployment is probably the simplest and the cleanest way to go. The following command (assuming you have Docker installed on your system) will pull the official image and start ONOS 1.15.0 (the latest stable version at the time of updating this post):
# docker run -p 127.0.0.1:6653:6653 -p 127.0.0.1:8181:8181 -dit --name my-onos-test onosproject/onos:1.15.0To access the ONOS web GUI use the following URL: http://127.0.0.1:8181/onos/ui.
Note: You will most likely need a SSH tunnel if the host where you have your browser is different from the host running the Dockerized ONOS instance.
The default account is User:onos/Password:rocks.

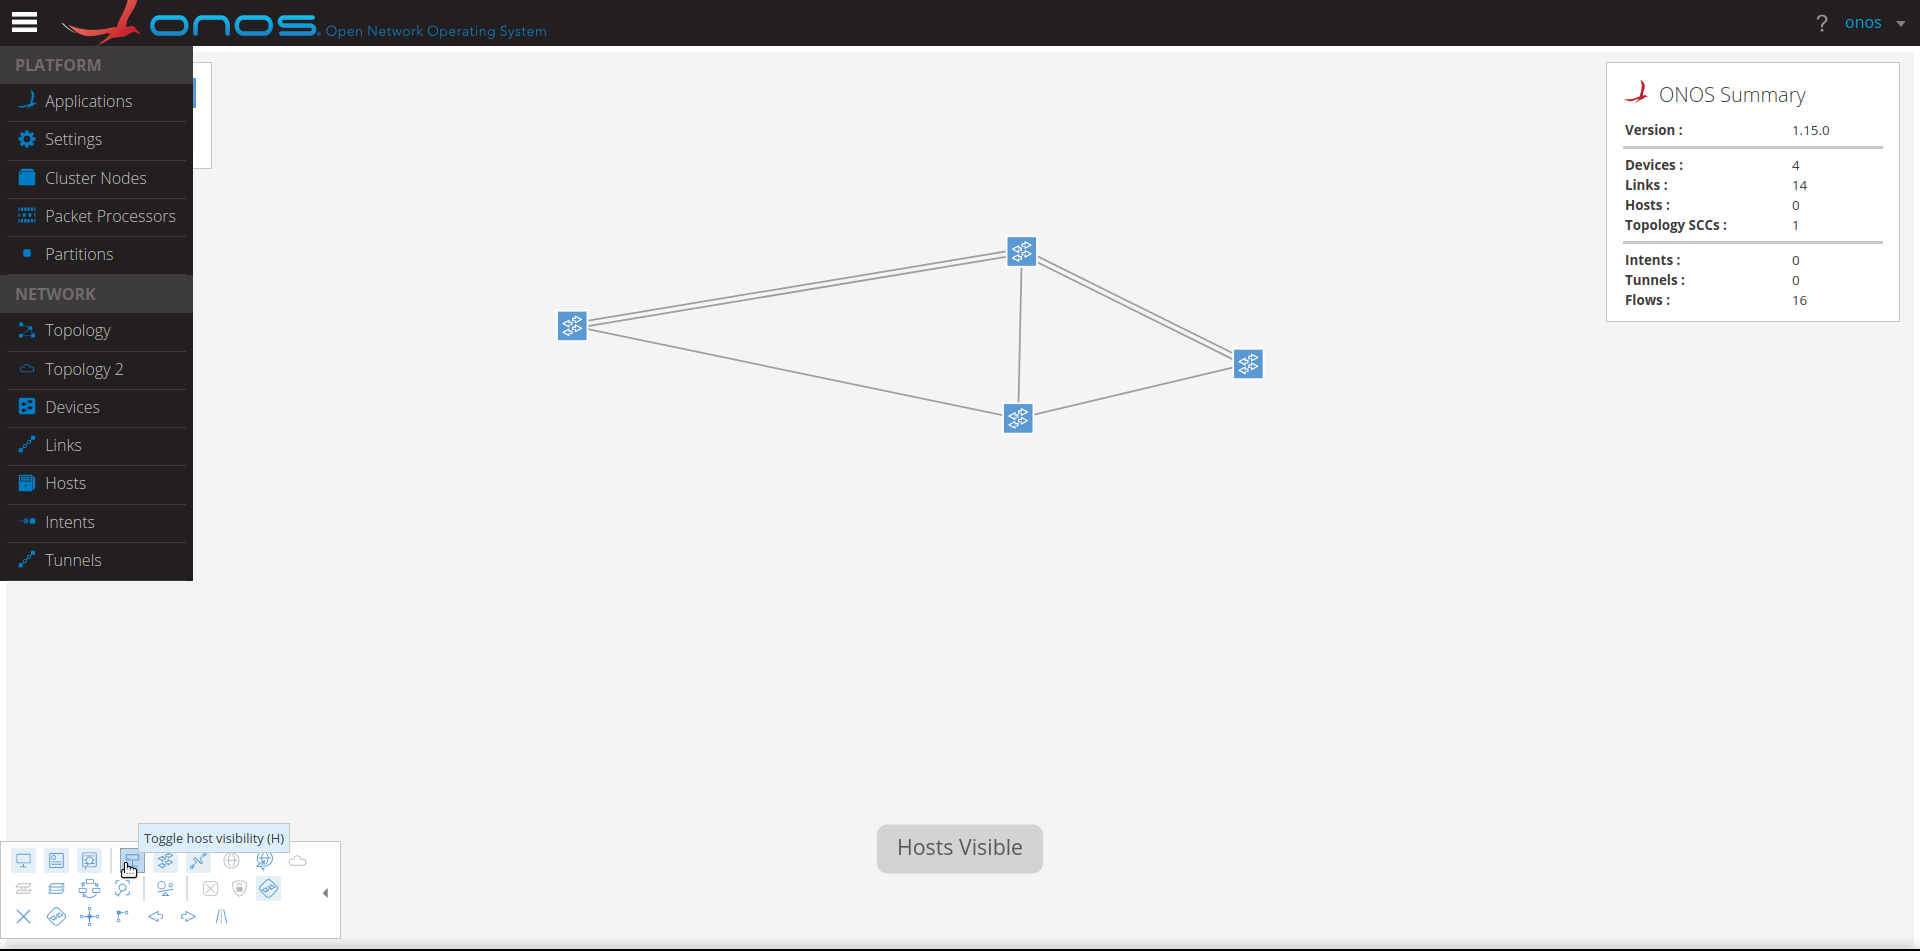
Once logged in, you should see an empty topology panel:

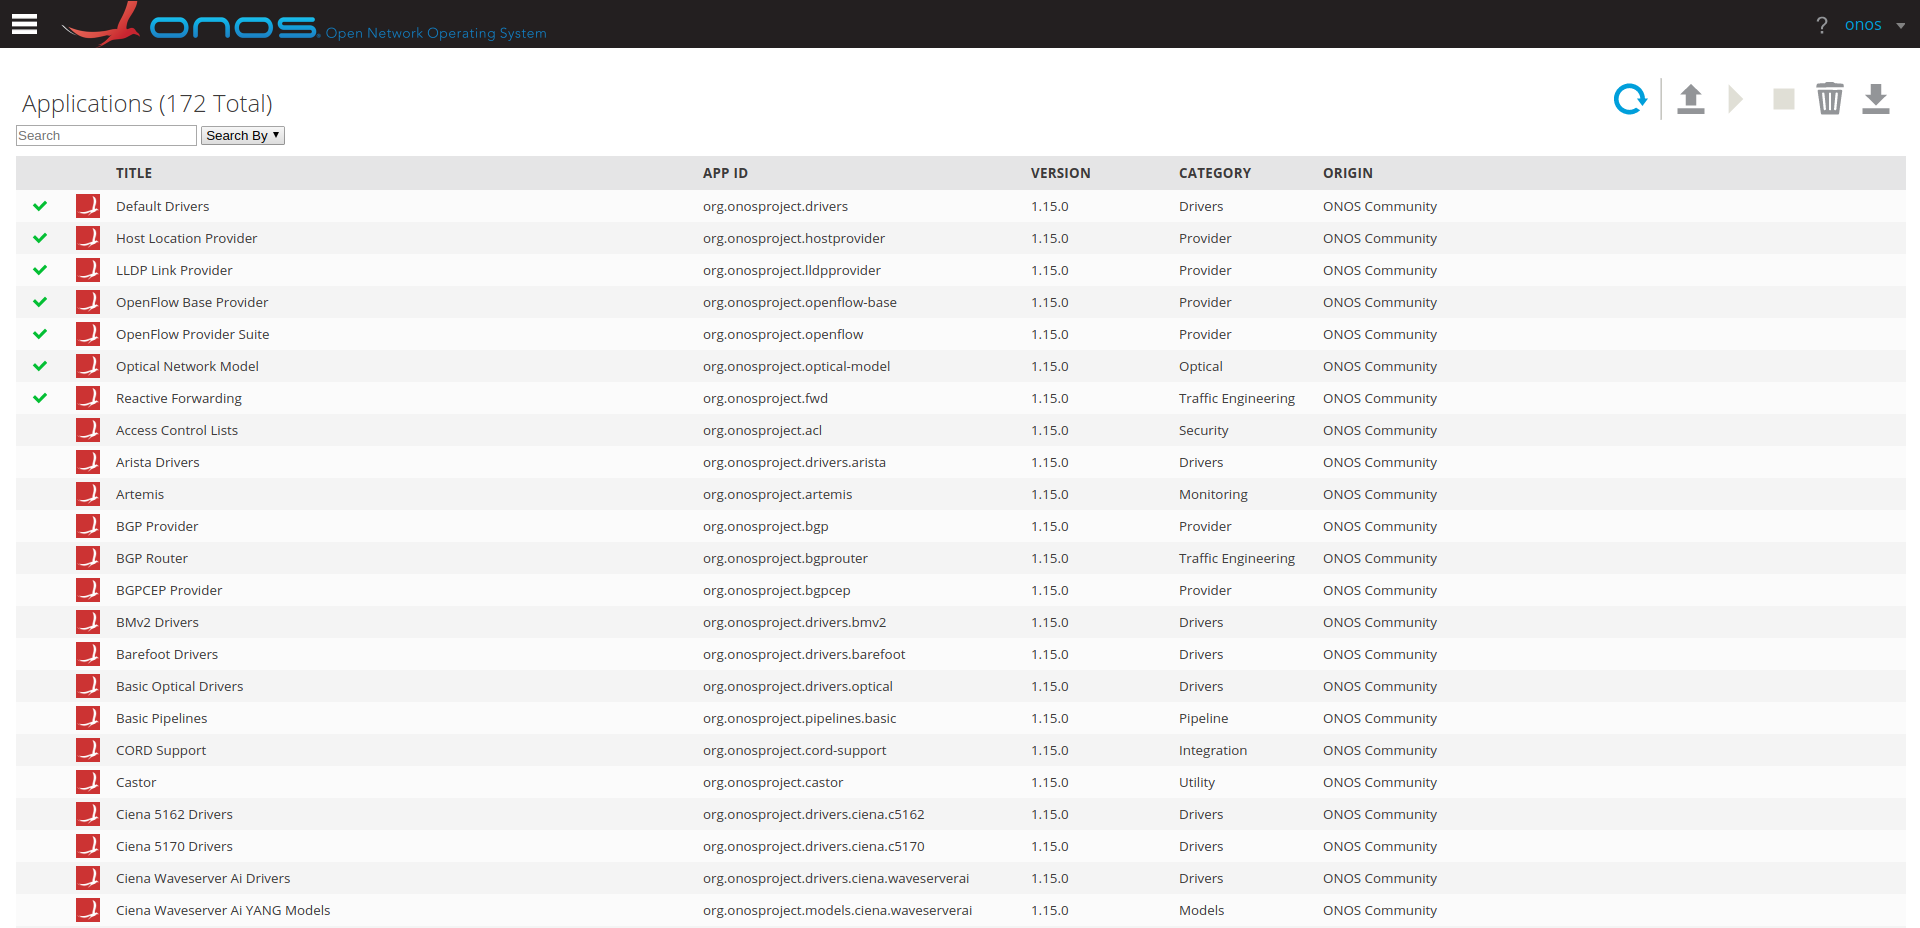
By default, ONOS will not display any devices nor allow ping between them. To change this behavior, we need to explicitly activate OpenFlow Provider Suite and Reactive Forwarding applications (use the "hamburger" button near the ONOS logo to get there):
Next, return to the topology view. You should now see your OVS instances. Use this opportunity to toggle on host visibility on the panel, by either pressing the H on your keyboard or by using the the slider menu in the lower left corner:
Host configuration
Next, we need to configure some IP addresses on your hosts. The hosts are implemented using the simplest form of Linux namespaces. To access their shells, you can use something like:
# ip netns exec Host-00 bash
... where Host-00 is the name of the host and bash is the name of the executable for the shell you would like to use.
To confirm that you have landed on the right host, use the following check:
# ifconfig -a
The output should look something like:
c.sw01-host00.1 Link encap:Ethernet HWaddr ba:a8:b8:5e:bf:3d
      BROADCAST MULTICAST MTU:1500 Metric:1
      RX packets:0 errors:0 dropped:2 overruns:0 frame:0
      TX packets:0 errors:0 dropped:0 overruns:0 carrier:0
      collisions:0 txqueuelen:1000
      RX bytes:0 (0.0 B) TX bytes:0 (0.0 B)

lo     Link encap:Local Loopback
      LOOPBACK MTU:65536 Metric:1
      RX packets:0 errors:0 dropped:0 overruns:0 frame:0
      TX packets:0 errors:0 dropped:0 overruns:0 carrier:0
      collisions:0 txqueuelen:1
      RX bytes:0 (0.0 B) TX bytes:0 (0.0 B)
The naming convention for the network interfaces (such as c.sw01-host00.1) may seem a bit cryptic at first but is actually there to remind you of your topology. The format can be broken down as c.<SWITCH>-<HOST>.<NUMBER>. The <HOST> part identifies the host itself (i.e. host00 for Host-00, host01 for Host-01, and so on). The <SWITCH> gives us the OVS instance to which this interface is connected. Finally, the <NUMBER> was introduced because you are allowed to have multiple connections between a single pair of devices (e.g. c.sw01-host00.2, c.sw01-host00.3, and so on, if we were to have them in our example).
Now, let's assign some IP address to the c.sw01-host00.1 interface:
# ifconfig c.sw01-host00.1 192.168.13.10 netmask 255.255.255.0
Trying to ping the other host on 192.168.13.11 will fail at this point but as a result, your OpenFlow controller will become aware of it:
# ping 192.168.13.11
^C
--- 192.168.13.11 ping statistics ---
60 packets transmitted, 0 received, 100% packet loss, time 59020ms
To leave the Host-00 and return to your main host, hit the Ctrl-D pair on your keyboard or simply use the exit command:
# exit
exit
To confirm that you have returned to the right place use the ifconfig -a command again. You should see a different output this time showing a bunch of OVS instances and veth pairs used to connect them.
To get the ping finally working, configure the Host-01 as shown in the following snippet:
# ip netns exec Host-01 bash

# ifconfig -a
c.sw03-host01.1 Link encap:Ethernet HWaddr 92:a7:7d:7e:da:1b
      BROADCAST MULTICAST MTU:1500 Metric:1
      RX packets:1 errors:0 dropped:0 overruns:0 frame:0
      TX packets:1 errors:0 dropped:0 overruns:0 carrier:0
      collisions:0 txqueuelen:1000
      RX bytes:90 (90.0 B) TX bytes:90 (90.0 B)

lo     Link encap:Local Loopback
      LOOPBACK MTU:65536 Metric:1
      RX packets:0 errors:0 dropped:0 overruns:0 frame:0
      TX packets:0 errors:0 dropped:0 overruns:0 carrier:0
      collisions:0 txqueuelen:1
      RX bytes:0 (0.0 B) TX bytes:0 (0.0 B)

# ifconfig c.sw03-host01.1 192.168.13.11 netmask 255.255.255.0

# ping 192.168.13.10
PING 192.168.13.10 (192.168.13.10) 56(84) bytes of data.
64 bytes from 192.168.13.10: icmp_seq=1 ttl=64 time=32.6 ms
64 bytes from 192.168.13.10: icmp_seq=2 ttl=64 time=0.493 ms
64 bytes from 192.168.13.10: icmp_seq=3 ttl=64 time=0.069 ms
^C
--- 192.168.13.10 ping statistics ---
3 packets transmitted, 3 received, 0% packet loss, time 2000ms
rtt min/avg/max/mdev = 0.069/11.086/32.696/15.281 ms

# exit
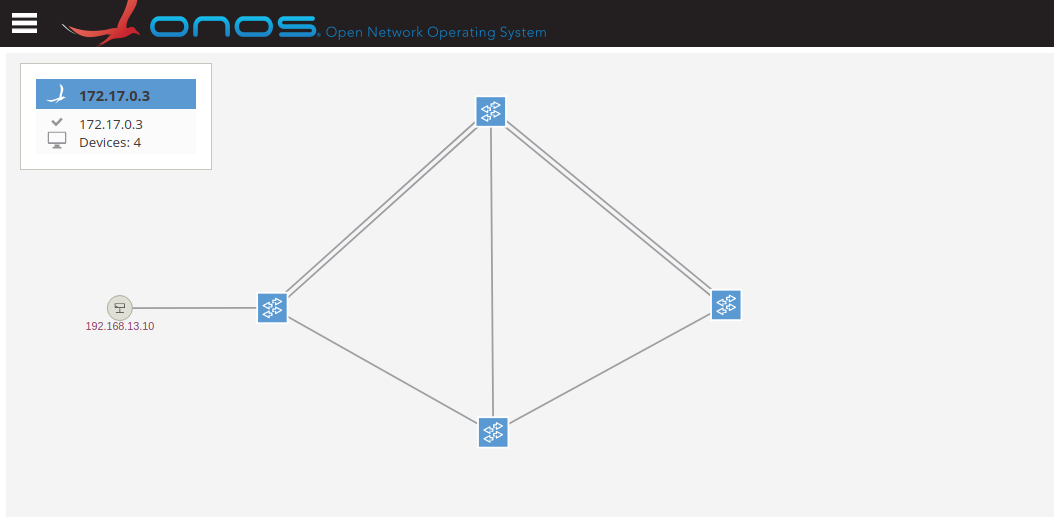
As the output confirms, the ping is now working and both hosts are recognized by the controller:

In order to make the IP configuration on your hosts more permananet, you need to manually add it to the data-plane script. The change has to be made just above the echo "Press Ctrl-C to exit..." command:
...

ip netns exec Host-00 ifconfig c.sw01-host00.1 192.168.13.10 netmask 255.255.255.0
ip netns exec Host-01 ifconfig c.sw03-host01.1 192.168.13.11 netmask 255.255.255.0

echo "Press Ctrl-C to exit..."
This part of the script is open for other types of "permanent" changes, as well. For example, you can extend your topology beyond the main host by attaching a real interface to one of your OVS instances. Adding other types of hosts (Docker, QEMU, Libvirt,..) into the mixture is also an option. Note that if you are adding your custom things to the script, you should also consider updating the clean-up routine.
Cleaning up the mess
To stop and clean up everything, all you need to do is "kill" your data-plane script:
# killall ovs-mesh.sh
As a result, this will remove the OVS instances, along with the hosts and the virtual cabling between them.
Note: Using SIGKILL (a.k.a. -9) to stop the script will not trigger the clean-up routine, thus leaving the topology garbage behind.
Note: The script does not allow multiple running instances of itself on the same machine.
Docker resources for ONOS can be completely released with the following sequence:
# docker stop my-onos-test
# docker rm my-onos-test
# docker rmi onosproject/onos:1.15.0
About OVS-Mesh Script Generator
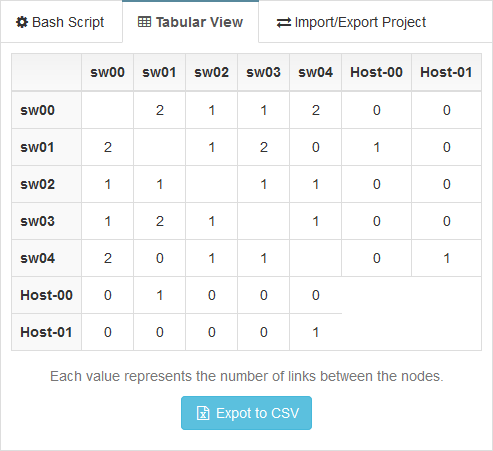
OVS-Mesh Script Generator was developed using Vue.js framework and Vis.js visualization library. Additional features include tabular connectivity view:
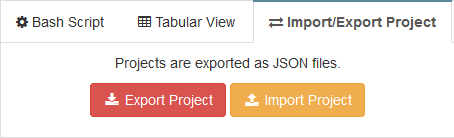
... as well as the option to save and import your topologies:
Feel free to use the comment section below if you have any questions.
Newsletter
Subscribe to my weekly Newsletter and stay tuned.